The “Near” Infrared part of the light spectrum is the area that is of interest. We have at one end the light spectrum the Infrared, then the Visible light (that we all can see), and beyond to the Ultra Violet.
Almost all digital CCD’s in cameras today are sensitive to all three – the Infrared, Visible and the Ultraviolet light. All CCD’s on digital cameras have an Infrared blocking filter in front of them. This stops any unwanted shifts in the colour of the image, and renders an image more to the true colours that we see. The Ultraviolet does not affect the colour of the image as much as the infrared does, but we all seem to put a UV filter in front of our lenses to cut out any UV “haze” and also to protect the lens. What is left of the spectrum is the visible light and this is what we use to record a normal image with.
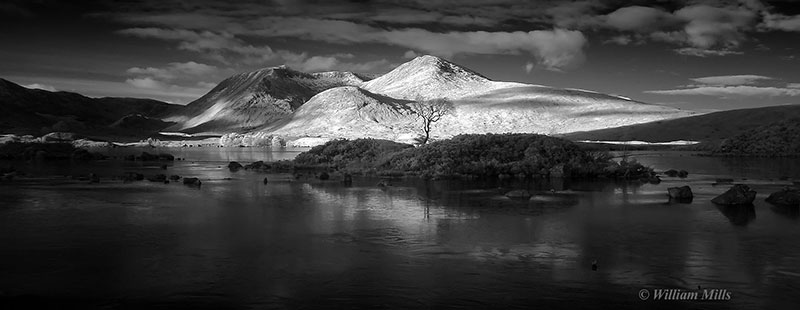
Quite a few years ago photographers started experimenting with other areas of light – in this case the Infrared (using Infrared film), they found out that it has very different qualities than that of the the Visible light. Grass and other green foliage appear white as they reflect large amounts of IR (Infrared). Dark glasses are completely transparent as they only absorb visible light. People’s skin tones are smooth and unblemished, dark clothing can appear white, running water appears quite dark, while still water appears lighter. The sky appears quite dark and clouds appear very bright, giving great contrast for black and white IR photographs. Overall the appearance is one of a bright winter’s day with everything covered in snow. They have a great ethereal quality, which I find to be fascinating.
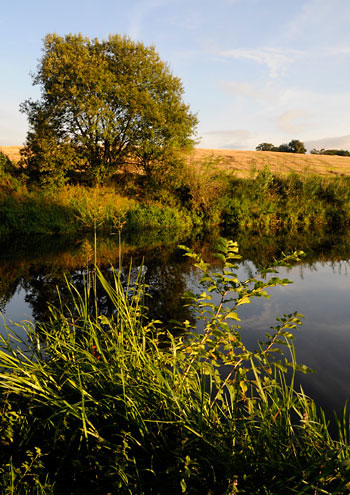
Union Canal (near East Calder – Sept 08)
ir1
Colour shot of the original scene.
ir2
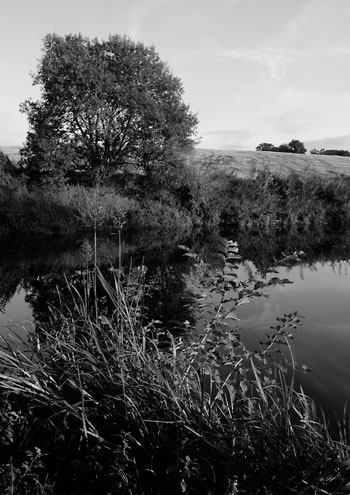
B&W Conversion from the colour shot.
ir3
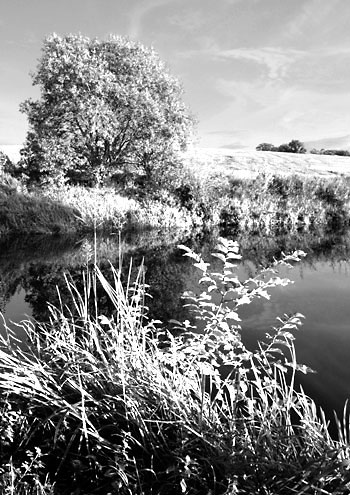
Fake Infra Red conversion in Photoshop.
ir4
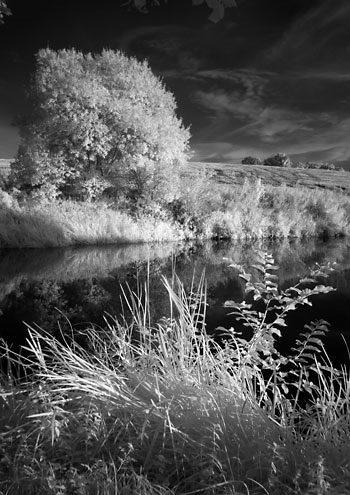
True Infra Red shot
Above on the left we have a normal colour image IR1, and next a B&W (Photoshop CS3) conversion IR2, and next a Photoshop CS3 B&W / Infrared filter simulation IR3, and last a true Infra Red image of the same scene (Sony H50 Night Shot Mode IR – 1/30th sec, f2.7).
How to take IR photographs? If you have a Digital Camera (non DSLR), you can determine how sensitive your camera is to IR light by shining the TV remote at the lens and observing the image in the LCD viewfinder or screen. The brighter the better. Now all you have to do is to put an Infrared pass filter in front of your lens and put your camera on a tripod and give it a try. The best results will be in full sunshine in the park with lots of trees and grass and lots of sky with clouds. You use a tripod as you not only have the IR pass filter in front of the lens but a IR blocking filter behind the lens in front of the CCD. So with relatively little light getting past, the exposure times are going to be quite long. If you are lucky and your camera is sensitive to IR light even with its blocking filter in place, the exposure times are perhaps in the range of 1/30 second to 30 seconds with a wide open lens. The IR pass filter that you have placed in front of the lens blocks out all the Visible and Ultraviolet light. Allowing only Infrared light to pass through. IR pass filters have names like Wratten (Kodak) #87, #87C, #88A, #89b and Hoya R72. They all start to cut off the visible light at different wavelengths.
IR Pass filters appear almost black to the naked eye, so when you put on the lens of a DSLR it is virtually impossible to focus and compose your shot while looking through the viewfinder (unless you have live view and can see the image on the LCD viewing screen). So you simply have to do this on a tripod, compose and focus first, and then when everything is set up, place the filter on the lens before taking the picture. Since the wavelength of IR is slightly different, the focus point will be slightly different than that of the visible light. But if the image is a landscape shot and the focus is near infinity, this difference will not matter that much. The old manual focus lenses used to have a little red dot or a little red “R” to the right of the focusing mark that indicated where the IR focus was located. Modern Auto Focus lenses seemed to have dropped this mark.
With non-DSLR cameras (digital cameras with fixed lenses), simply placing a IR Pass filter (R72) on the front of your lens, putting it on a tripod, viewing, composing and focusing on your subject, images such as the following are now possible –
Bavelaw Loch June 08 (Infra Red)
")
Some photographers go all the way and replace the IR blocking filter from in front of the CCD with clear glass, or an IR pass filter, making the camera permanently for IR use only (Life Pixel http://www.lifepixel.com/). There are also the range of Sony (non DSLR – H50 http://www.letsgodigital.org/en/18485/sony-cybershot-h50/) cameras that allow the user to remove the IR blocking filter with a little switch on the camera, in what Sony calls “Night Shot” mode. Combining this camera with an IR Pass filter makes them ideal for IR photography.
I have a Nikon 950 (purchased on eBay) that I am currently converting to IR by removing the blocking filter and replacing it with the same size clear optical glass, and adding a small IF Pass filter in front of the lens. So that (with the lens wide open) faster shutter speeds are possible. see – http://www.abe.msstate.edu/~jwooten/camera/lense.html
If the B&W surreal look that you get from Infrared photography appeals to you, why not give it a try!
Some Infrared Resources –
Shooting Infrared with Digital Cameras – by Thom Hogan http://www.bythom.com/infrared.htm
Eric Cheng – A tutorial in Infrared Photography http://www.echeng.com/photo/infrared/tutorial/
Eric Cheng Infrared Photography Website http://www.echeng.com/photo/infrared/
Don Ellis’s Kleptography – Great examples of IR Photography http://www.kleptography.com/gallery-irengland.htm
Wj’s Photo Homepage for the biggest list of anything to do with IR http://www.markerink.org/WJM/HTML/mainpage.htm
Rannoch-Moor-(Infra Red)
")